Saturday 28 January 2012

The Dweller Gets the Reno Bug...Dining Room

Just like all good things in life, a successful renovation just keeps you wanting more!  So it is with that attitude that I persevered and decided to tackle our dining room.  This room is just across the hallway from the Oasis so while I am dwelling, I will get to enjoy the view to this room as well.

The dining room is currently a gold colour from Benjamin Moore, Quincy Tan HC25 .  The floors are an espresso brown oak and the room is long and narrow with a bay window facing the street.  The  wall unit and small bar are black and the table is a medium brown.  The chandelier is a "goldish" metal of some kind and I am thinking that might have to be replaced or repainted.  Sadly the upholstered chairs have to find a new home as well as the gorgeous new, yes new, artwork!

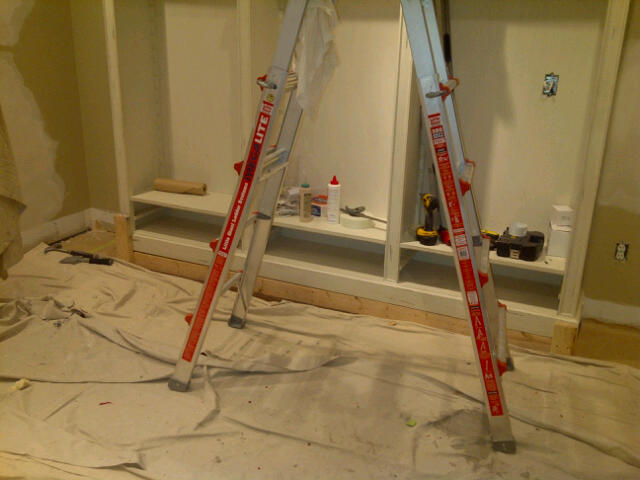
The  professionals arrived and began with the usual coverups and well as starting with a coat of primer everywhere.  My plan is to have panel moldings applied to the walls, similar to the oasis but with a beefed up crown piece and a small second panel rectangle in each panel in the top quarter.  I am also planning to have two sconces installedon either side of the mirror above the little black bar piece.  The crown molding that currently exists in the room is plaster, fancy and was probably quite expensive for the previous homeowners.  Instead of demolishing it like we did in the oasis, we hope to simply cover it with a larger piece of plain molding.  The baseboards will be replaced and panels installed not only in dining room but in the adjacent walk thru pantry as well.  Paint will be trim white on panels and Benjamin Moore's Kendall Charcoal on the top third.  Whew!  A Tall order


Fingers Crossed!!

 The walk thru pantry leading from dining room to kitchen, dark brown cabinets covered with plastic on right.
The bright spot is one of the two new roughed in areas for the sconces......

So far so good.............

Full On Reno....Dining Room

The original plaster molding
Covering up the crown was a tall order and caused a delay right away as the molding had to be special ordered.  It was a very inflexible type of molding and was difficult and time consuming to install.  The finished product is stunning but it set our completion date back.
Newly installed crown with small additional piece of molding on bottom.  In order for this molding to fit snuggly the carpenters had to chisel away at the decorative plaster ....more mess and time sadly!

The panels have been started and we have discovered that with the placement of light switches, etc that the second smaller panel cannot be added.  This was disappointing as I had hoped it would add more of a formal feel to the dining room.  Oh well!!
The panels are the same dimensions as the ones in the Oasis.  The baseboard is  7 in doorjam and will be finished with a simple shoe molding on the bottom along the floor.
Getting closer.  Hard to tell in this photo but I have painted the chandelier with metallic pewter paint.  I will be changing the shades to a white colour.  I have been told that they can be spay painted.....will update on that result in a few days!

Dining Room Paint Day

I am so happy with how this room is shaping up.  The first coats of paint already look fabulous and I cant wait for it all to be complete.  The dark grey is Kendall Charcoal and the white is trim white.


Almost There.......


Just a few more finishing touches and the crew will be rolling up their drop sheets and leaving me with a beautiful new room.

Funny thing about this light fixture........it was formally a Restoration Hardware piece...sort of a tarnished bronze finish with 8 gold linen lampshades
I used metallic paint from a craft store in a Pewter finish.  The paint went on thick and smooth.  Took no time at all to have a beautiful new faux finish.
I then painted the lampshades (yes painted!) with white fabric paint.  That also went on smoothly with a roller and left behind a flawless finish.
Here is the final product. I was so happy with it UNTIL..........
I turned on the light switch and MY OLD FIXTURE APPEARED!!  The gold from the linen shades glowed right through the 4 coats of white paint.  The metallic finish also took on that gold hue and looked exactly like it did before I painted it!!   It has become the marvel of the entire room.  My kids especially like to turn the switch on and off saying "new light, old light, new light, old light"  hahaha

The Finale: Dining Room

The project is done and I am thrilled with the results.  The crisp white wall panelling is stunning next to the dark grey above.  The espresso oak floors never looked so good and I didn't even touch them!!

I love deep plum and will be accenting with that colour when the Begere chairs are finally finished!


Now if only the dining room came with its own gourmet chef...................


BEFORE
                                                                         

                                                                                    AFTER


Dining Room......Sidebar

While on the path to the new Dining Room, which we are now calling the Martini Lounge, I decided to tackle a reupholstery job.  I have had 2 Bergere Chairs for 13 years, never really loved them, and now have the chance to turn them into something fabulous.


The 2 removable cushions are going to be covered by a Professional, but I am going to take on the rest.


Removing the back panel and small foam inserts was not fun but not difficult.  What was difficult, however, was the removal of about a thousand staples per chair.  Lucily I purchased a little tool at my local Lee Valley that helped with the job.  Nonetheless, I had bleeding knuckles and very red, sore hands after.  The removal of the backing, armrest and piping along the chair base took about 4 hours!!


Keeping the original seat base seemed like a good idea.  I will just cover it with fabric.  The little foam armrests were also in good shape so I just removed the fabric on top of them.


After a light sanding, the chairs were primed.


First coat of black paint.

YES  YES  The painting looks a bit messy but I didn't care!  All surfaces that needed to be  black and glossy are just that.  Any black paint on the fabric will be covered shortly!!

Bergere Nightmare.....Dining Room

IF I could stop this project right now, I would !!  I must admit that I am a very impatient person and a job like this calls for someone with the patience of a Saint!!

The Black paint went on smoothly...........that is a positive start non??

The upholstery, not so smooth and I am afraid that it is only going to get more challenging.  I managed to get the back fabric of one chair on and in place  and stapled the foam on top.  The  challenge for me was to hit the exact spot for the staples, not to high, low or on the inside of the chair......black fabric on black paint in the dusky hours of the day made for a "fun" experience.  I managed to get the outer fabric (like a foam sandwich) in place and stapled down.  By the time I trimmed away all the excess fabric and foam I could tell that my lines were not straight.  On occasion I also seemed to have missed the mark with the electric staple gun and pierced thru the wood frame just enough to cause it to splinter!!

Going to let the next chair sit for a day or two..............Really.............I am going to finish them!!!


A FEW DAYS LATER.........So I did get the beautiful black
velvet in place.  Made lots of errrors but I am hoping the piping from the Seamstress will cover them.  The cushions are being reupholstered and I will have a new look for these old chairs in a few weeks.
The unfinished chairs have made their way into the dining room (aka Martini Lounge) and I cant wait until they are finally ready to be sat upon.

Sunday 1 January 2012

Reclaiming the Space... The Oasis

After 6 years of looking at this little 12by12 makeshift tap dancing studio for my daughter, it was time to reclaim the space.  Although the room served a great purpose for those years, it was time to make it my own.  As well, this is the one large window you can see into from the street and, honestly, it appears as though we haven't fully moved in for 6 years...bare walls, no furniture, not even overhead lighting.

The room was a square of laminate flooring over the hardwood (tap shoes!), a small table and a misfit lamp!  I had some years to plan and design and now it was time to put the plan into action.....

The Wish List.....The Oasis

I had so many ideas for this little space....I guess I thought the room was a lot larger than it really it is!
A built in book shelf, crisp white panel moulding, ceiling lighting, a desk, a cozy ottoman, an ipod dock, a gas fireplace, 2 comfy leather chairs.............

I also knew what I didn't want (that is always a good place to start)  I certainly didn't want a "living room" from days of your...the stuffy unsat upon furniture, formal lighting and an uninviting feel.  The quotes from Millwork professional came in and I almost gave up on the project.  The shelves alone would absorb almost all of my budget (quote was $9000) !!
A yellowy painted shelf...needed some work but was a steal

These 2 recliners (leather!) were also a great find but once delivered I worried they were  too large for space!

This beautiful gas fireplace had a mantle issue and it did not sit flush against the wall.  AAARGGH
My good friend Donna and I hit the streets and combed local furniture stores in the hopes of some other inspirtation.  The bookshelf above was a great find (needed painting) as were the leather chairs.  The white mantled gas fireplace followed.  The large pieces were in place........now for the hard stuff...

The HELP!!.....The Oasis

Some kind of glorious divine intervention happened when Donna suggested a husband of a co-worker who might be able to help out with the trim and really, make this room what I had hoped it would be!!  Andy showed up, unassuming and yet professional and I instantly knew he was the man for the job.  When his quote came in via email my fingers were crossed that it would not break my budget!  He was more than fair and work was scheduled to start in advance of the Christmas holidays

First:  a box needed to be constructed above the mantel, about half the width of the mantel and in alignment with the fireplace.  The popcorn ceiling was removed , replaced with a smooth one, 6 pot lights running the length of the room with 2 more focused on the box above the mantel


 The next minor project was to raise the bookshelf so that the baseboard could run continuously around it and give it the appearance of a built in bookshelf!   A small box was constructed and secured under the bookshelf.  Then it was slid against the wall, wired for three undermount lights on the top shelf and secured with brackets from the top, out of sight.


Thoughts.................Moldings........who knew you needed to be a design engineer to piece them all together.  Being green and naive I assumed there was a set pattern for panels.  Of course there isnt!!  I have learned that having a great imagination and an ability to put a puzzle together is an asset in this area.  I decided on 4 inch frames with a beaded trim inside, topped by a 5 inch piece with a backbanding above it.  The baseboard was a 7 inch door jamb with a  small decorative piece on the very bottom.


The paint on the panels was regular glossy white trim paint from Sherwin Williams.  The grey above is Stonington Grey from Benjamin Moore (love it!!)

The Final Touches...The Oasis

After 8 days of having Andy and his partner Chris in our home, they were ready to roll up the drop sheets and call it a day.


A little creative decorating, and of course, Santa above the fireplace......and an oasis was born

Finishing with baseboard trim


Bookshelf is painted and lighting installed

Trim and wall panels get final coat of paint

Lights working!!

Christmas and Santa!!


I have always dreamed of shelving and a ladder in this room.  Done and Done!


So happy, chairs look proportionate.  Mantel has been trimmed in.  Colour is soothing and relaxing.

You can find me, dwelling in this oasis on any given day!!